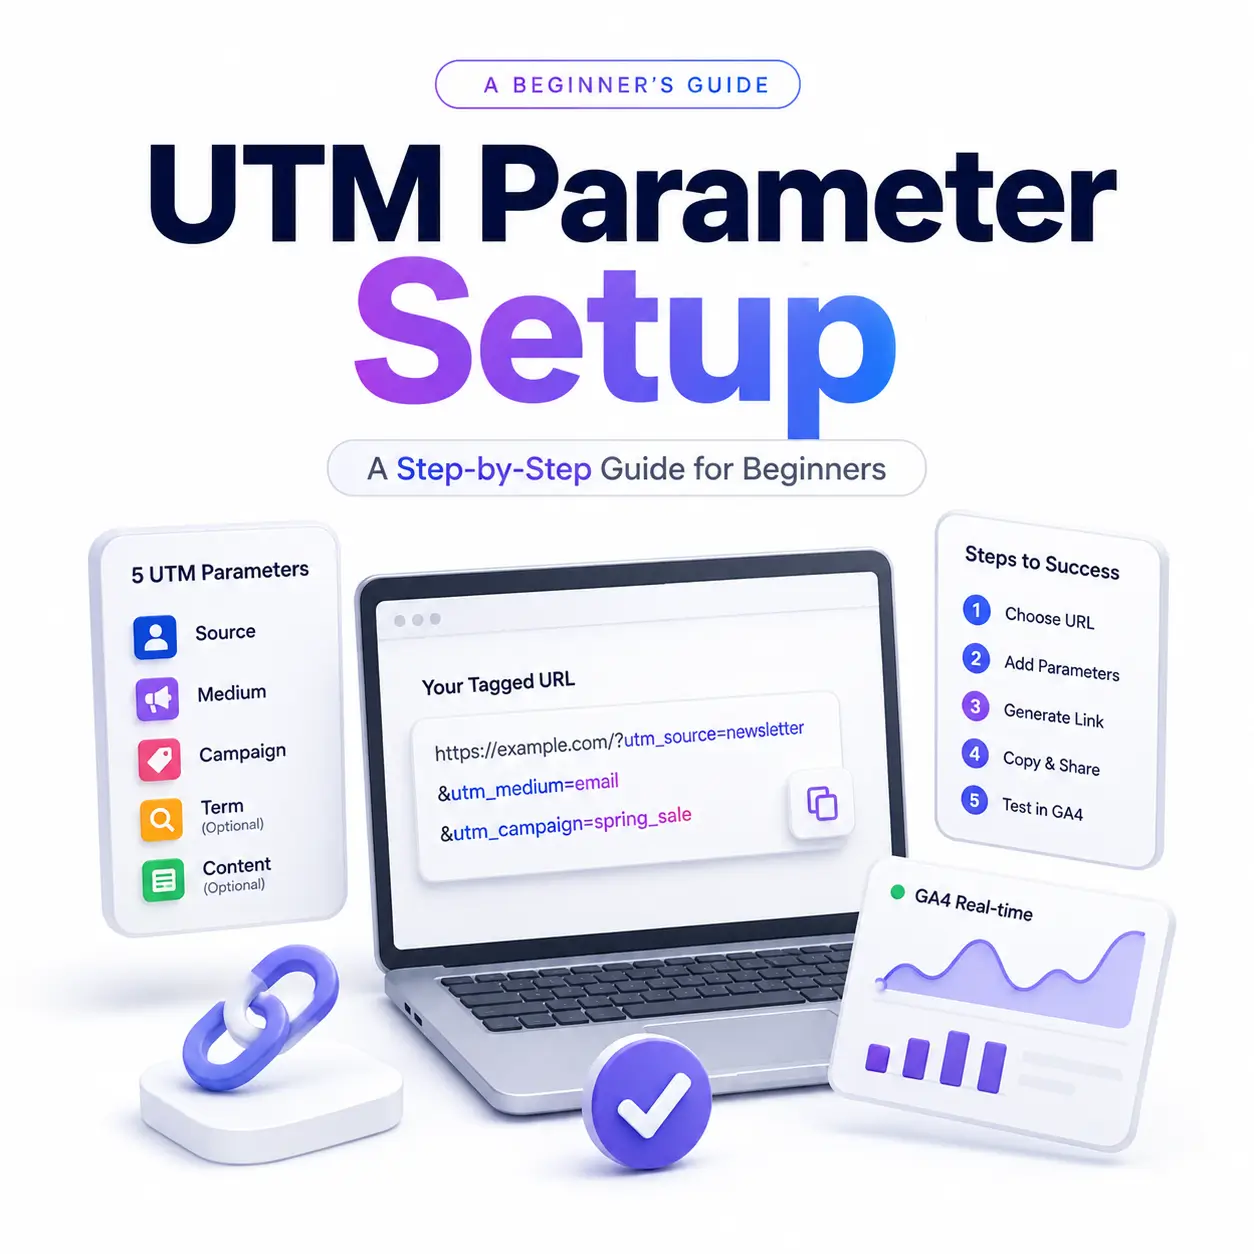
If you’ve ever posted a link on social media, sent a marketing email, or run a paid ad and wondered exactly which one actually brought people to your website, you need a proper UTM parameter setup. It’s one of the simplest habits in digital marketing, and once you understand the five parameters and the naming rules behind them, you’ll never have to guess where your traffic came from again.
This guide walks you through a complete UTM parameter setup for beginners: what the parameters are, how to build your first tagged link step by step, and how to avoid the small mistakes that quietly wreck beginners’ analytics data.
What Are UTM Parameters?
A UTM parameter is a short snippet of text added to the end of a URL that tells your analytics tool exactly where a visitor came from which website, which campaign, and which type of link they clicked. UTM stands for Urchin Tracking Module, named after Urchin Software, the analytics company Google acquired to build Google Analytics.
Here’s what a tagged URL looks like in practice:
https://example.com/?utm_source=newsletter&utm_medium=email&utm_campaign=spring_sale
Adding these tags doesn’t change where the link goes or how the page looks to a visitor. It only adds tracking data that Google Analytics 4 (GA4) and other analytics platforms read when the click happens.
Why Marketers Use UTM Parameters
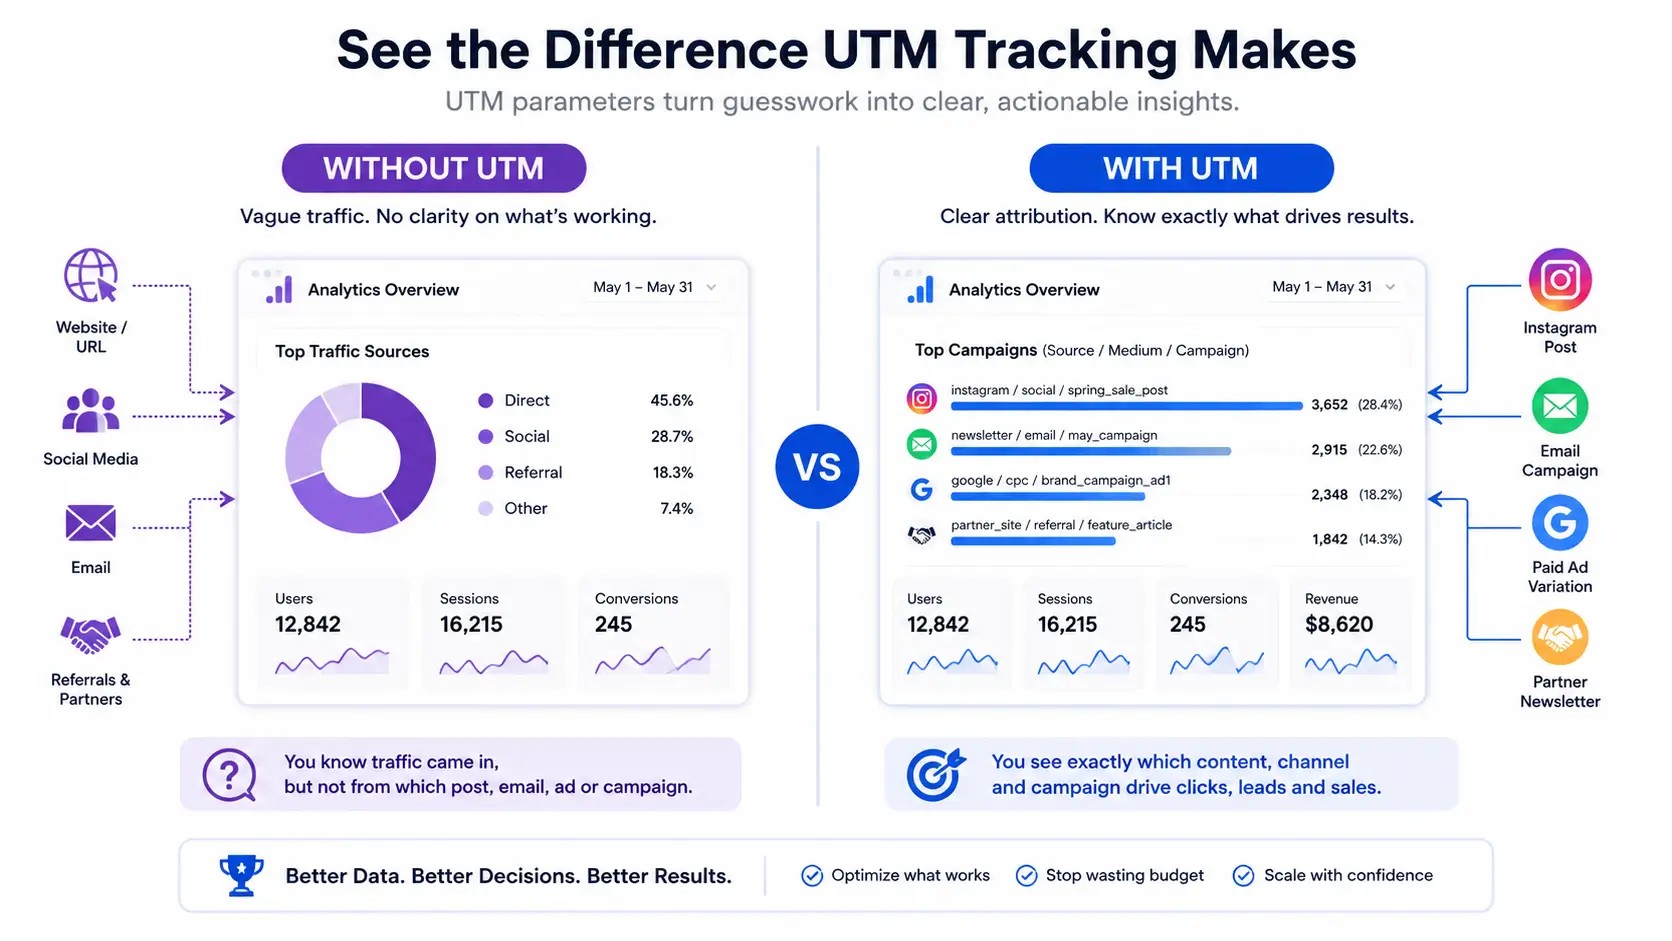
Without UTM tags, most analytics tools lump traffic into broad, unhelpful buckets: “social,” “referral,” or worst of all, “direct.” UTM parameters let you see the full picture instead:
- Which specific Instagram post drove signups, not just “Instagram traffic” as a whole
- Whether your Tuesday email or your Thursday email got more clicks
- Which paid ad variation is actually converting, down to the exact creative
- Whether a partner’s newsletter mention is worth paying for again
According to a 2024 Bitly study, inconsistent UTM tagging can cause data losses of up to 35% in campaign attribution, meaning more than a third of a team’s marketing wins can get credited to the wrong channel, or vanish into “direct traffic” entirely. Setting tags up correctly from the start is what prevents that.
The 5 UTM Parameters Explained
There are five core UTM parameters. Three are required for any link you tag, and two are optional extras for more advanced tracking.
The Required Three: Source, Medium, and Campaign
- utm_source: Where the traffic is coming from (e.g., google, newsletter, facebook)
- utm_medium: The general channel type (e.g., email, cpc, social, referral)
- utm_campaign: The name of the specific campaign or promotion (e.g., spring_sale, product_launch)
These three answer the core question every marketer asks: where did this visitor come from, through what channel, and as part of which effort?
The Optional Two: Term and Content
- utm_term: Identifies paid search keywords, mainly used in Google Ads campaigns
- utm_content: Differentiates similar links or ads, commonly used in A/B tests (e.g., “blue_button” vs. “green_button”)
Skip these two unless you’re running paid search or testing multiple versions of the same link for everyday tagging, source, medium, and campaign are enough.
Step-by-Step: Your First UTM Parameter Setup
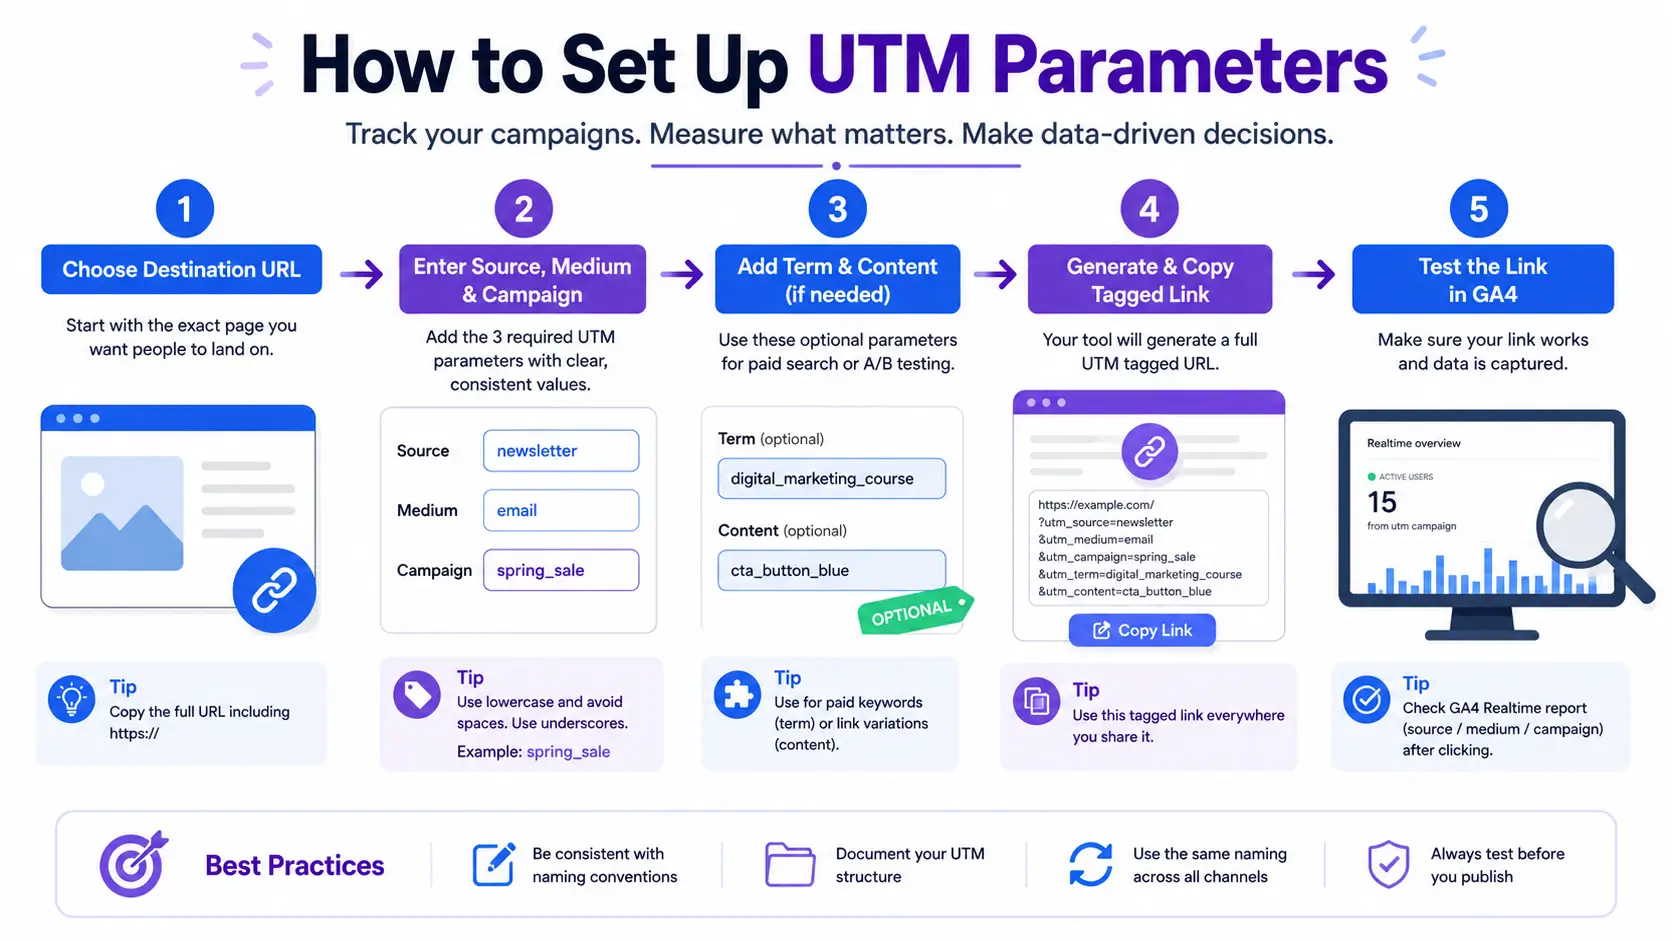
Here’s the exact process for a complete UTM parameter setup, from choosing your destination page to publishing a tested, tagged link.
Step 1 – Choose Your Destination URL
Start with the exact page you want people to land on — your homepage, a landing page, or a specific blog post. Copy the full URL, including https://.
Step 2 – Fill In Your Source, Medium, and Campaign
Open a free tool like Google’s Campaign URL Builder, or a WordPress-friendly option like MonsterInsights if your site runs on WordPress. Enter your destination URL, then fill in utm_source, utm_medium, and utm_campaign using short, clear, lowercase values.
Step 3 – Add Optional Term and Content Tags
If this is a paid search ad, add utm_term for the keyword you’re targeting. If you’re A/B testing two versions of the same link, use utm_content to tell them apart, e.g., header_cta vs. footer_cta.
Step 4 – Generate and Copy Your Tagged Link
The tool will build the full URL for you, with all your parameters appended after a question mark and joined by ampersands. Copy this complete link; this is the one you’ll actually share, not your original untagged URL.
Step 5 – Test the Link Before You Publish It
This is the step most beginner guides skip, and it’s the reason people end up with “no data” a week into a campaign. Before your link goes live anywhere:
- Click the link yourself (or paste it into a browser) and confirm it lands on the correct page
- Check that the URL wasn’t mangled if you ran it through a link shortener
- Open GA4’s Realtime report and confirm your test click shows up with the right source, medium, and campaign values
Only once your test click appears correctly in GA4 should you publish the link in your actual email, ad, or post.
UTM Naming Convention Best Practices
Before UTM Parameter setup, tag a single link, agree on a naming convention with your team and stick to it. This one habit prevents the majority of UTM problems beginners run into.
- Always use lowercase. UTM parameters are case-sensitive, so “Instagram” and “instagram” register as two different sources.
- Pick one separator and stay consistent. Choose underscores or hyphens for multi-word values (spring_sale, not spring sale) and never mix the two.
- Keep values short and readable. Long, cryptic campaign names make reports harder to scan later.
- Document your conventions. Keep a shared spreadsheet listing your approved source, medium, and campaign values so the whole team tags links the same way.
Common Naming Mistakes That Break Your Data
- Using “fb,” “facebook,” and “Facebook” interchangeably across different campaigns
- Tagging internal links on your own site, which corrupts your attribution data
- Reusing the exact same tagged URL across multiple, unrelated placements
- Letting different team members invent new campaign names instead of following the shared list
Where to See Your UTM Data in Google Analytics 4
Once your tagged links start collecting clicks, GA4 is where you’ll review the results. Open GA4, go to Reports > Acquisition > Traffic acquisition, and you’ll see sessions broken out by channel, source, and campaign.
Reading Your Campaign Data in GA4
For a more granular view of your UTM-tagged links specifically, look for the manual campaign reporting view, which reflects your exact utm_campaign values rather than GA4’s broader default channel groupings. Don’t stop at session counts; check engaged sessions, conversions, and revenue if you have ecommerce or goal tracking set up, since raw clicks don’t tell you which campaigns actually drove results.
Common UTM Mistakes Beginners Make
Most of these errors trace back to a rushed UTM parameter setup, skipping the naming convention step or publishing a link before testing it. Watch for these in particular:
- Inconsistent capitalization: splits one campaign’s data into multiple rows
- Tagging internal navigation links: overwrites the visitor’s original traffic source
- Skipping the test step: links go live with typos that never get caught
- Forgetting to shorten long tagged URLs: messy links look unprofessional and are easy to mistype when shared manually
- Assuming UTMs hurt SEO: they don’t; they’re for analytics only and do not affect search rankings
Free Tools to Build UTM Parameter Setup Faster
You don’t need paid software to tag links correctly. These free options cover most beginners’ needs:
- Google’s Campaign URL Builder: a simple form that generates a complete tagged link
- A shared UTM spreadsheet: track campaign name, source, medium, full link, owner, and launch date so your team stays organized
- WordPress plugins like MonsterInsights: build and track campaign links directly from your WordPress dashboard
- Social scheduling tools with built-in UTM presets: platforms like Hootsuite let you save reusable UTM templates for recurring campaigns
Frequently Asked Questions
What is a UTM parameter in simple terms?
A UTM parameter is a short snippet of text added to the end of a URL that tells your analytics tool exactly where a visitor came from — which site, which campaign, and which type of link they clicked. It doesn’t change where the link goes, only what gets tracked.
What are the 5 UTM parameters?
The five standard UTM parameters are utm_source (where the traffic came from), utm_medium (the channel type, like email or social), utm_campaign (the specific campaign name), utm_term (used for paid keywords), and utm_content (used to differentiate similar links, like in A/B tests).
Do I need all five UTM parameters every time?
No. Only utm_source, utm_medium, and utm_campaign are required for reliable tracking. utm_term and utm_content are optional and mainly useful for paid search campaigns or when A/B testing multiple versions of the same link.
Are UTM parameters case-sensitive?
Yes. Google Analytics treats “Instagram” and “instagram” as two separate sources, which splits your data into duplicate rows. Always agree on a lowercase naming convention before tagging your first link.
Do UTM parameters hurt SEO?
No. UTM parameters don’t affect search rankings because they’re only used for analytics tracking, not for how search engines crawl or index a page. Google recognizes them as tracking parameters, not separate pages.
Where can I create a UTM parameter setup for free?
Google’s Campaign URL Builder is the most common free tool — you fill in a short form and it generates the tagged link for you. Several WordPress plugins and marketing platforms also include built-in UTM builders.


